Saturday, July 27, 2013

Saturday Sites 7/27/13!!!

Hi everyone!! I had the most amazing week at camp ever!!! And...... Let's all give Iman a big round of applause for doing a great job this week!! WOOOT WOOT!!!! GO Iman!!!! Anyways... This weeks Saturday Sites are....
  • Refashionista is an amazing blog!! What Jilly (I think) does is find clothes with a cute print but super ugly build at thrift stores, then she cuts, sews, and transforms each piece into something gorgeous!! For someone who enjoys sewing and thrifting, this is the place for you!! Jilly is hilarious and all of her posts are entertaining to read! Go check out her blog now!! (WARNING: There is frequent reference to alcohol and alcohol consumption. Nothing bad, just a heads-up!)
  • Another House Full Of American Girl is a really cute blog. I love everything she does!! She has been talking a lot about some new series and things that she will be doing on her blog. It all sounds like so much fun!!! Go check it out!!!!
  • Pretty Lily An American Girl is a fun blog with amazing photography!! She has so much creativity and all of her posts are fun to read!! Her dolls all look like they are having a blast!! Be sure to stop by her blog!!!!
Thank you all for your patience with us as we experienced slight technical difficulties. Claire M., I accidentally deleted your comment on Iman's melted crayon sun post. (Oops) I am so sorry but thank you so much for your kind comment!!! Thanks for reading!!
~Hannah (the human)

Friday, July 26, 2013

Fashionista Alert! :) (FASHION FRIDAY!!!!)

What's up girls!? I hope you don't mind that there are not many pictures to show you for this post. I promise I will make it up to you girls! (if you enjoy my posts that is?!) :) I really hope you do because I have a lot of fun writing them! These pictures don't really go well together, but I think they show super cute fashion sense on their own! :) Like always, please enjoy! :)


I think at some point most girls put on a pair of shorts and a comfy t-shirt. What do you girl's think is the most comfy to wear? I would wear this on a super hot day with an orange flower clip in my hair!


This girl looks amazingly adorable! I love her sun hat with the red ribbon with the bow tied in the back. The dress which is mostly a stunning red makes the ribbon on the hat stand out more! The blue bow on the back of the dress looks very nice and tones down the stylish outfit. I would have loved to wear this outfit when I was younger!


Although this picture of a lovely young lady looks slightly strange I love her dress! The bright colors of the floral print convinced me right away that this is a must-have for me.


This combo reminds me of a Native American girl. The tribal earrings look like feathers but I would skip them because my ears are very sensitive! :( The jeans are kind of slim but I still love them because of the cuffs! These capris are super cute! The shoes and shirt are two styles I am not a fan of for myself, however I do like this trend on others. To sum it up, this outfit is not for me.


As Hannah has mentioned recently, Summer is coming to an end. Therefore, I have decided to include OMBRE NAILS in this post! Why, you ask? I love this new trend, it is subtle and pops at the same time, (a hard combination to find) and I think it screams out, IT'S SUMMER!!! Bright colors do show Summer spirit....at least for me. Anyway, onto the next picture.... 


Ooooh this girl's hair is soooo pretty!!! How I love the white bow in her hair, it looks even more adorable with the white dress she has on. I would definitely do my hair this way. I would really like to wear this dress as well.


Yes. I know I showed a flower crown last week, I just wanted to do another one because I found this one cute as well. (and this may happen with other fashion accessories and items as well) I may post some similar pictures throughout the weekly additions of Fashion Friday! So, the pink roses look cute and I think the bits of green small rose buds (they are yet to bloom :) are needed in this fabulous crown. I would wear this with the white dress you saw earlier in this post and a pair of pink flats.


Ok, so that just about wraps up this post! Hannah is coming back and will post the normal weekly Saturday Sites tomorrow! I hope you liked the extra posts I wrote this week while Hannah was away! See you next week for another weekly addition of randomness and FASHION FRIDAY posts! Enjoy the weekend and savor the last few weeks of Summer! :)

Fashionably Yours,
Iman

Thursday, July 25, 2013

Strawberry Buckle!

What's Summer without strawberries!? When you have too many strawberries and can't seem to eat them up you can make a delish dessert.


1. Gather all baking ingredients and tools.
(I used strawberries but the recipe calls for raspberries as well)


2. Combine butter and sugar.


 3. Add egg and stir.


4. Measure flour, baking powder, and salt into bowl.


5. Combine 3 & 4 and add yogurt.


6. Add 5 into an 11x7 greased pan. (I used an 8x8)
7. Add sliced strawberries on top of batter.


8. Sugar, flour, ground cinnamon, and butter to make topping.


9. Spread topping over fruit.


10. Bake and eat!

Enjoy this delicious treat!

Baker Iman

Wednesday, July 24, 2013

Randomness!

Hi girls! Are you ready for another fabulous bunch of random pics?! :) Well here goes nothing.....


Hope you liked these pictures. They put me at peace what things make you feel at peace?

*RANDOM* Iman

Tuesday, July 23, 2013

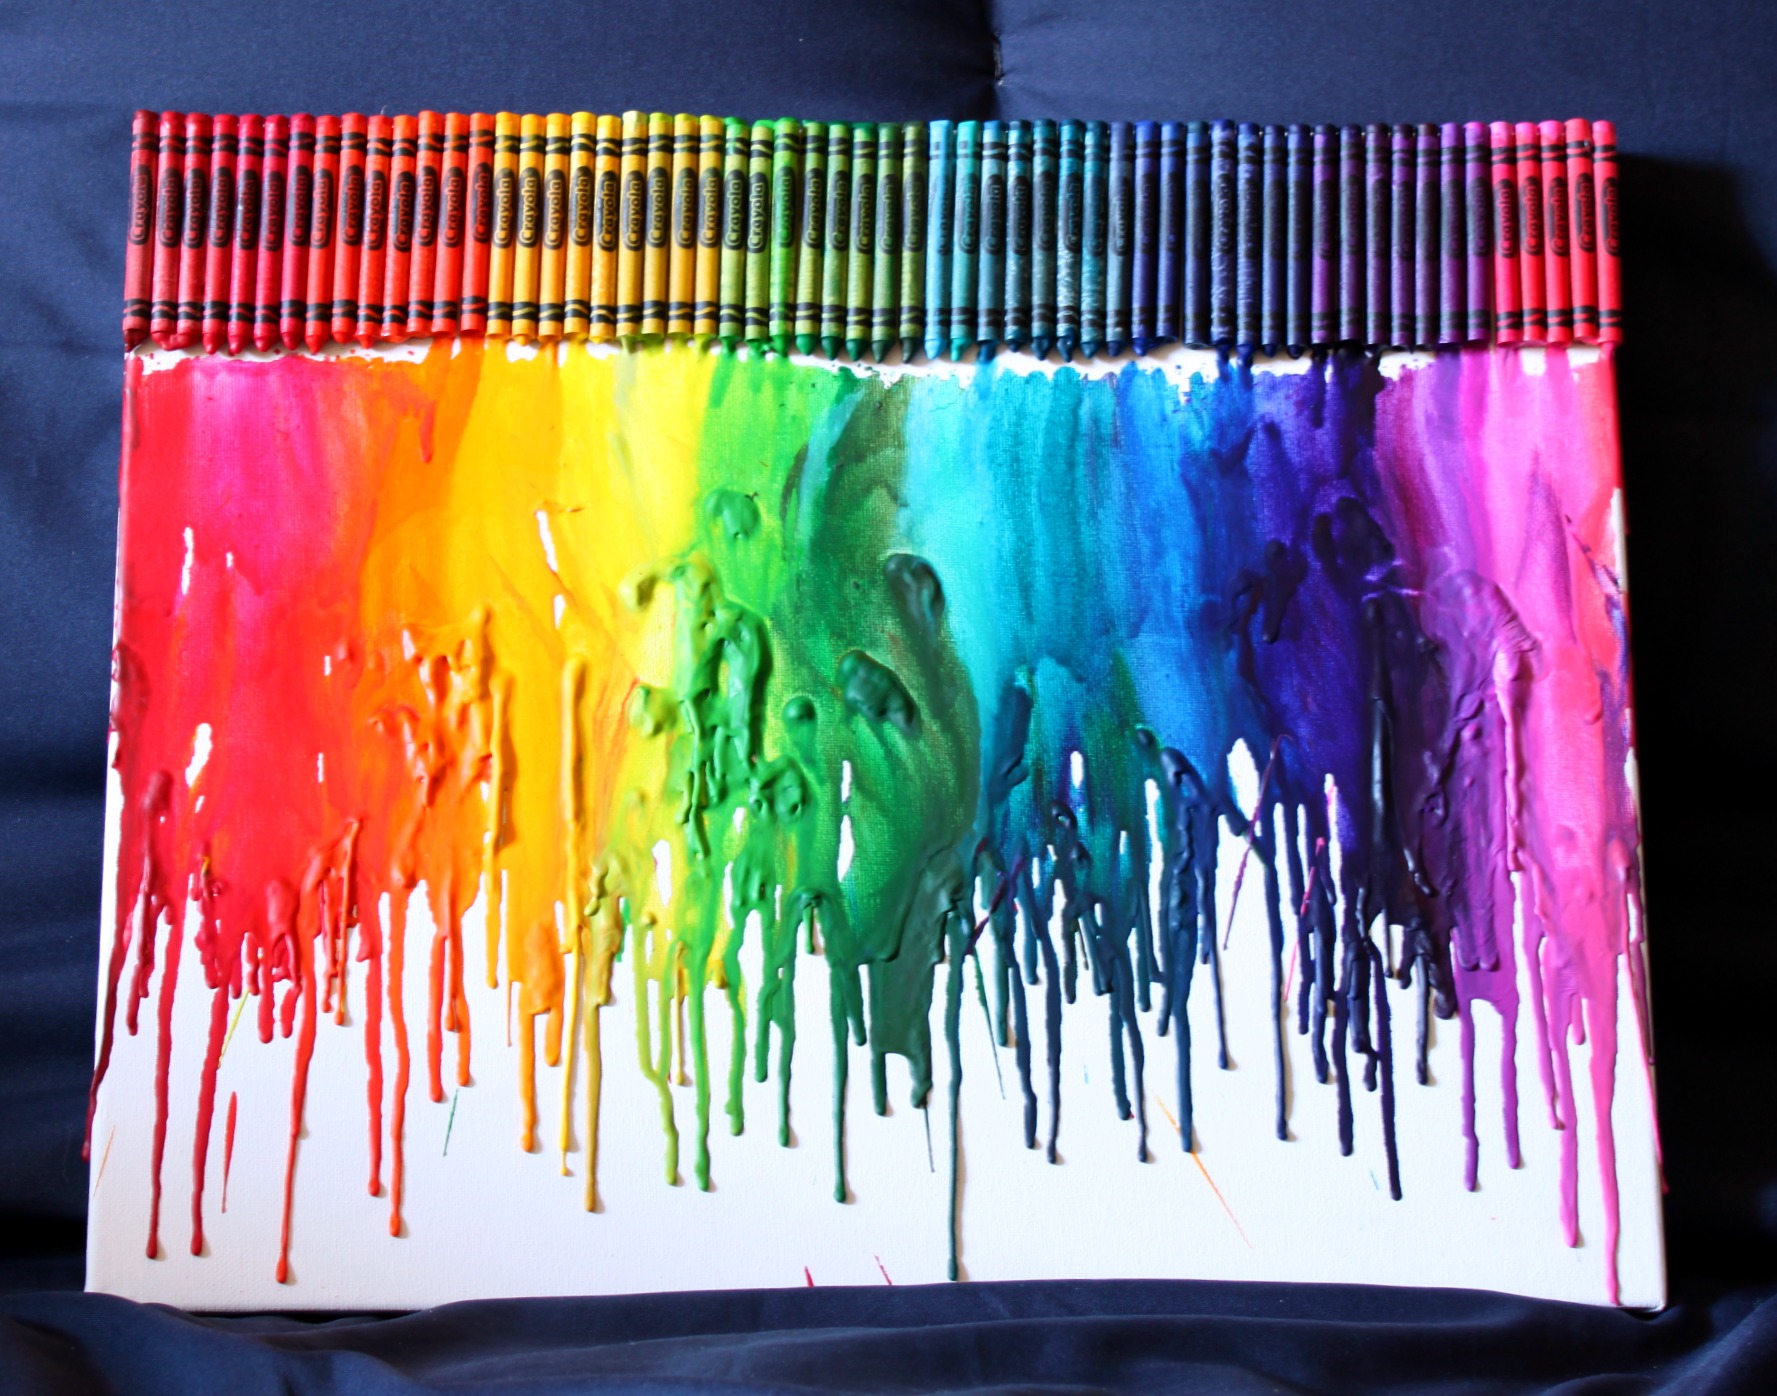
Melted Crayon Sun!

Hi girls! It's time for an art project!

My inspiration was this picture of melted crayons! 


You will need:
  • crayons (any colors you want!)
  • glue gun
  • hair dryer
  • canvas (I used 12 in x 12 in/30.4 cm x 30.4 cm)
  • tarp
  • plastic spoon


Begin by peeling the paper off the crayons. I used red, orange, & yellow. Ask an adult nearby to use an x-acto knife to complete this task quickly and easily. After this, begin breaking crayons into 1/4 and 1/3 sized crayon pieces.


Next, I traced a large circular object to become the center of the "sun" I created. Now it's time to glue! Use a hot glue gun & stick the crayon onto the canvas, making sure to place the pieces onto the inner part of the circle.


For the next step, make sure to cover surrounding areas with tarp.  Melting crayons are messy and can splatter! Turn hair dryer on and start melting the crayons. This took me about 10 minutes.


After the short wait, I took a plastic spoon and began to spread the melted wax around.


Oooh what a bright sun! But wait, we're only half-way done! Break the crayons you want for the rays & glue them down.


Keep the hair dryer above the crayon pieces blowing heat downwards. I began to mess around with the direction of heat to blend colors.  Have fun with the creation you make! All in all, this step took about 30 minutes to complete.


My final product was a perfect version of the Sun! You may notice some crayon pieces remain on the canvas while others fell off! I like this texture, but you may prefer to melt all crayons completely.


Here is another piece I made by melting crayons which I call Space!

Iman 


Monday, July 22, 2013

Crafty Monday: Doll Trundle Bed!!

Hi everyone!! As promised, today's post is all about my trundle bed. It is soo comfy and big!! I love it! I do want to mention that the main frame and idea of the bed was inspired by My Froggy Stuff's How to Make a Doll Daybed with Pull-Out Trundle. Now for pictures. I don't have pictures of Hannah making it, but I do have the final result pictures.

I will apologize in advance for the lighting issues. Silly Hannah was in a rush to finish before she had to finish packing. Here is the bed, though I ended up switching my pillows to the other end.

Here is the main frame. Hannah wrapped the bed with white computer paper instead of fabric. The only issues with it is it gets dusty and can rip, but it has a nice clean finish.

Here is the underside of the bed. I reinforced it with cardboard strips and lots and lots of tape.


Because the paper didn't cover all of the bed and to give it a nicer finish, I wrapped two sheets of sturdy cardboard and laid it over the unfinished area. It helps to reinforce it as well. Here I am for size comparison. Hannah made the bed bigger so that two to three people can lounge on the bed comfortably.


 A side and back view of the bed.


If you haven't noticed already, the bed is a bit slanted, so Hannah grabbed some bottle caps that she has been saving from this amazing lemonade she loves, taped two together twice, and put one on the back corner and the front end on the lower side. She also added a tape roll to the top to help it stay in place.


 Hannah had been saving this sheet of styrofoam for a while and was able to use it to make a super cushy mattress. (If you can't tell already Hannah is a corner cutter when it comes to big projects) She took some stuffing from an old Halloween costume and arranged it on the top, took a piece of fabric, put it over the stuffing, flipped it over and taped it to the styrofoam. She used scotch tape and it does come off occasionally, but it sticks right back on.


Hannah got this cool butterfly fleece and cut twice the amount she needed. Then she flipped it inside out and stitched until she almost had a bag. Then she flipped it right side out, finished sewing it closed, and made a lightweight but warm comforter/blanket.


The trundle part was a box trimmed down to flat cardboard, then we cut tabs in it and made a box. Two pieces of leftover styrofoam were wrapped to look like drawers and taped to the front. Drawer pulls were contemplated but decided against.


Hannah might make matching bedding (if she ever gets around to it) but the bedding I had on my old bed works perfectly. The fake drawers slide right in and completes the look!!

I added my body pillow and my stuffed animals. Supposedly some coordinating pillows are in the works, but you never know.

The best thing about this bed is having friends over!! This is Jerry and he is a very good friend of mine.

Jerry and I both enjoyed our beds. We thought they were very comfy. 

Thanks for reading!! Iman has a great series-of-sorts that she will be doing this week and next, so be sure to keep stopping by!! And reader submissions are always welcome at hannahandiman@gmail.com!! :) Bye!!!
~Hanna (the doll) 
P.S. Two cats and two places to sleep equals double relaxation. 
P.P.S. It was brought to light by my brother that our email address appears to be Hanna-handi-man. Please understand that it is Hannah and Iman.